CC 2019 Liquify Window looks like this after updating to Big Sur. What should I do
Does it work correctly? If that doesn't solve it, you can quit Photoshop and put the Settings folder back. It may help if we could see your Photoshop System Info.

Liquify not working since updating to 2021 Photosh... Adobe Support Community 11970192
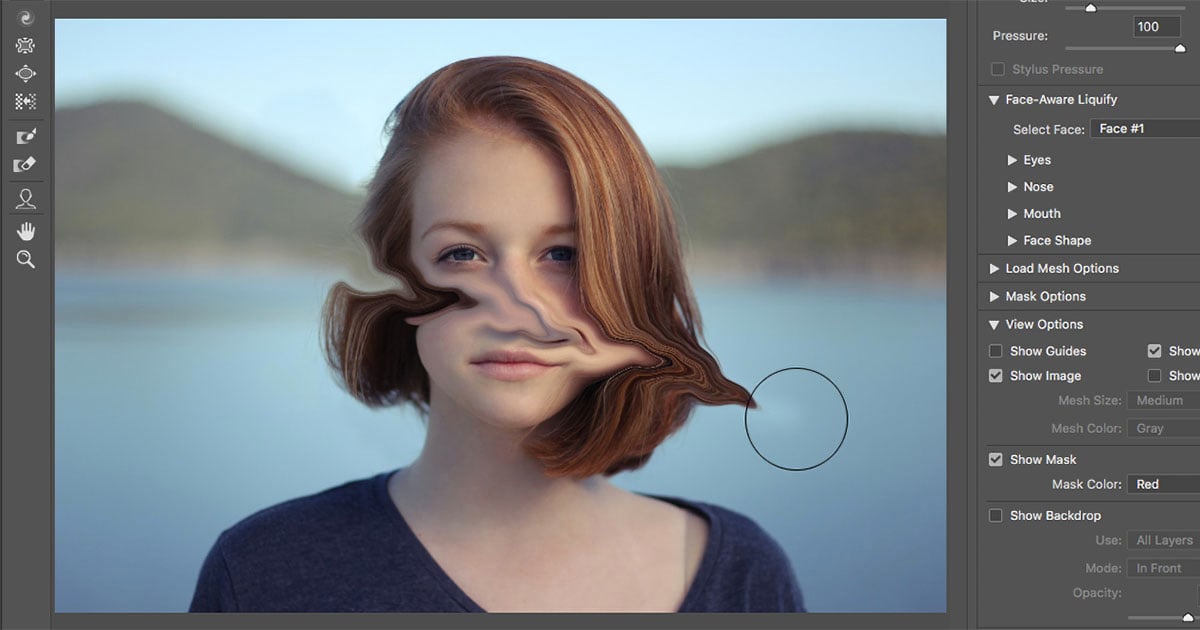
The Face-Aware Liquify Sliders. As I mentioned earlier, there are two new additions to the Liquify filter in Photoshop CC 2015.5; a new Face Tool located in the Toolbar, and a new set of sliders for controlling different areas of a person's face. We'll start with the sliders which are found in the new Face-Aware Liquify section of the Properties panel on the right:

How to Use Liquify in CC
Basic troubleshooting steps to fix most issues Image enhancement and transformation Drawing and painting Color Management Troubleshooting Fixed issues Known issues Optimize Photoshop performance Basic troubleshooting Troubleshoot crash or freeze Troubleshoot program errors Troubleshoot scratch disk full errors

How to Use Liquify in CC । Liquify Tool Tips and Tricks YouTube
The Liquify tool is a filter in Photoshop that manipulates an area of a photo by using such settings as Forward Warp, Twirl, Pucker, and Bloat, to name a few. These settings distort an image in different ways depending on what setting you use to Liquify.

Liquify Adobe CC 2019 YouTube
Troubleshooting Liquify filter overview The Liquify filter lets you push, pull, rotate, reflect, pucker, and bloat any area of an image. The distortions you create can be subtle or drastic, which makes the Liquify command a powerful tool for retouching images as well as creating artistic effects.

How to Use Liquify in CC
On a Mac, make a new layer using ⌘+Option+Shift+N. Then use ⌘+Option+Shift+E to duplicate your image into that new layer. If you're using a PC, use Ctrl+Alt instead of ⌘+Option. Make sure you have this new layer selected before opening the Liquify tool. Now it's time to move into the Liquify tool.
Blog Posts daxfake
Are you wondering why the liquify filter is not working in Photoshop? In this tutorial, I will show you how to fix it.Subscribe, Boop the Like Button &.

Caricature Tutorial using Liquify Tool in YouTube
Liquify tool is not working miluniel Community Beginner , Jun 15, 2020 Hi, A few days ago my liquify tool stopped wotking. I can see everything in the preview but, when I click the "OK" button to apply the changes to the image, it's loading much longer than it used to and then the image goes back to the way it was before I used the liquify tool.
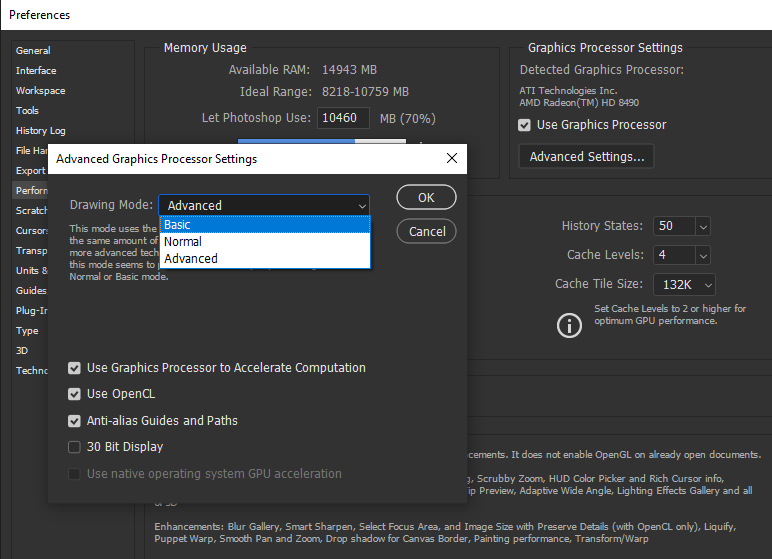
Liquify faceaware not working due to GPU. Adobe Community 10135403
1 Correct answer kevin stohlmeyer Community Expert , Jan 17, 2023 Jan 17, 2023 kevin stohlmeyer • Community Expert , Jan 17, 2023 Jan 17, 2023 Try these two preference changes (one at a time): 1. Go to Preferences/Technology Preview and check "Disable Native Canvas" 2. If that does not fix, go back to Technology Preview and check "Older GPU Mode"
Fix After Effects crash in progress
Open your image as normal: Go into Liquify as normal, make your edits, and select ' Save Mesh' before exiting Liquify. It'll ask you where to save and typically just let it save in the location of the image being worked on. There's no need to keep the file name in mind either, and you'll see why. Me, with a beer belly.
Tutorial Liquify CC 2019 YouTube
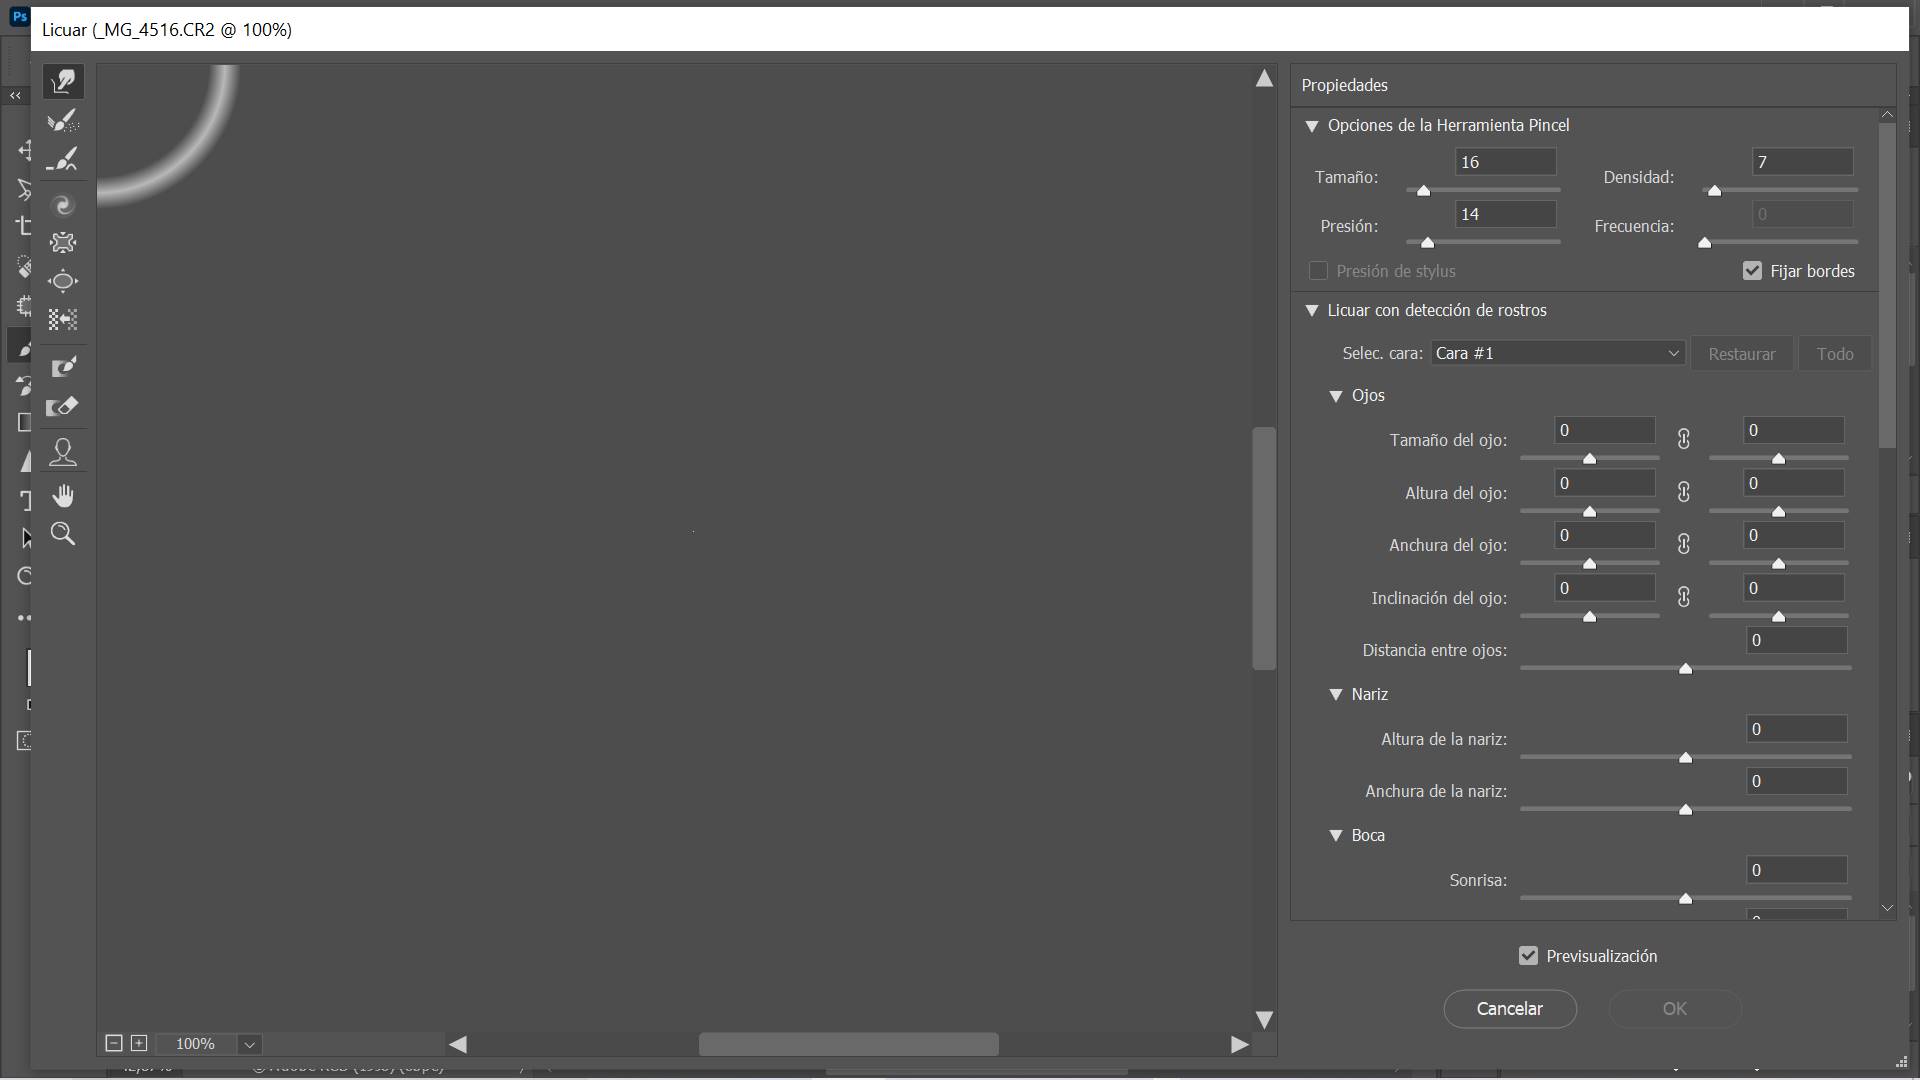
Use this option with the following steps: Open an image in Photoshop with one or more faces. Click "Filter," then select "Liquify" to open the dialog box. Select the "Face" tool in the tools panel. You can also press "A" on your keyboard. With this action, the faces in your image are identified automatically.

Why The Liquify Filter May Not Be Working In DW
5) Best DOUBLE EXPOSURE Effect, Photoshop 2019 tutorial. 6) How to Remove Anything from a Photo with Photoshop 2019, Clone stamp, Patch, Content Aware. 7) Body Shape Editing With Photoshop 2019, Puppet warp and Liquify Tool. 8) How to Select and Change Colors in Photoshop using: color range, hue saturation, adjustment layer. See full profile

Solved Liquify tool is not working Adobe Support Community 11209252
Liquify - Adobe Photoshop CC 2019 - YouTube In this video, you can learn how to use the liquify option in adobe photoshop cc 2019. Apply this effect to the people in your images who are.
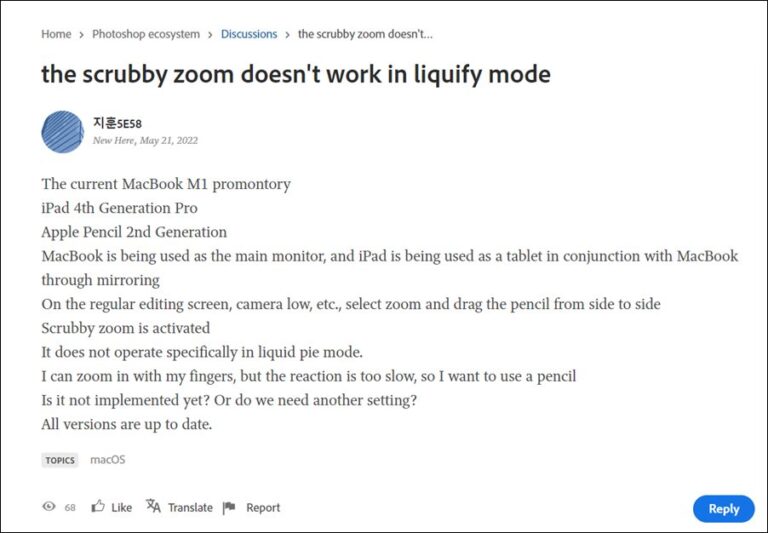
Adobe Liquify Zoom Slow/Not Working [Fix] DroidWin
1 Correct answer markr68389099 • Community Beginner , Jan 13, 2017 I have this problem as well. I followed all the step adjusting Ink, then the login items and it works for a bit then stuck on hand tool again. Now I can't change Ink or delete login items so I'm stuck with the hand tool.

How to Use Liquify in CC
Solution 1: Create a Liquify Mesh on a Lower Resolution Many artists want to keep their work at higher resolutions, but this proves difficult when it slows down your progress. Luckily, you can apply edits in Liquify by temporarily lowering the resolution of your work. Always Control-J to create a duplicate of your artwork as a backup copy.

liquify not working in images under 800 pixels Adobe Support Community 13130857
Just running a 1 step action with Liquify in a batch process will always crash Photoshop with this error from 475-500 images. This only happens in CC 2020 but not CC 2019. ( Source) Adobe had fixed the issue back then with the Photoshop 21.1 update. But fresh reports suggest that the bug is affecting users once again. Click/tap to enlarge image